Archive | tutorials RSS feed for this section

Scripture Cases

8 Jan

For their 8th birthday,  we give the kiddie pies their own set of scriptures.  I promised Pumpkin Pie a case to carry them in, and about 2 months after her birthday, I finally made it using this fun scripture case tutorial from PolkaDotChair.

I made one for Cherry Pie, too.

I was making cases for a Bible and Triple Combination, soft paper bound, which together are larger than a mini-quad (what Melissa at PolkaDotChair was making a case for).  I like my cases to fit pretty closely so the books aren’t wallowing around in there.  Also because my kids have a tendency to hoard bits of trash and I didn’t want much room left for bits of paper.  If you want to make your own case for scriptures like ours and don’t want to do the math, here are the dimensions I used.  (Also in case I decide to make more and want to remember the math.)

Denim:
1–  9 3/8 x 8 inch for the flap
2– 6 1/4 x 8 inch for the front & back
1– 4 3/8 x 20 inch strip for the gusset
2– 2 1/2 x 16 inch strips for the handle

It took a little bit more than a fat quarter for the lining:

2- 6 1/4 x 8 inch for front & back lining
2- 5 1/4 x 8 inch for front pocket
1- 9 3/8 x 8 inch for the flap lining
1- 4 3/8 x 20 inch strip for the gusset lining

Seam allowance 1/2″ everywhere except the handle- do 1/4″ seams on the handle.

The first case I made was too tight.  The gusset was 1/4 inch too narrow.  I ended up unpicking all the seams and resewing them smaller so that there would be more room in the case.

**This is one of the secrets I’ve learned that has made me happier with my sewing.  When it isn’t right, I take the time to fix it.  It’s totally worth it.  If you hate unpicking, check your seam ripper.  If it is so rusty, it looks like you stabbed someone with it and left the blood to dry, spend $4 on a new one.  Totally worth it.

**Secret #2 top stitch.  It makes everything look more professional.

I adjusted the measurements for the second case and it turned out perfectly.  (The measurements above are the adjusted ones.)

Serendipity

13 Apr

Sometimes If I just click on tabs on the side of blogs, I end up somewhere cool.

This lady did a blog last year-12 crafts til Christmas and shared what she did.

and she made a PDF file of how to make a Pillow Buddy!!!!!!!!!!!!!!!!!!!!!!!!!!!!!!!!!!!!!!!!!!!!!!!!!!!!!!!!!!!!!!!!!!!!!!!!!!!!!!!!!!!!!!!!!!

I love her forever.

and my children will love her forever once I’ve purchased fabric and created these for all of them.

They’ll love me forever also.

Now, do I make them for Easter, Birthdays or Christmas??? (listed in order of nearness in time. Probably Christmas is the only realistic choice–but not the fun choice.)

Tutorial: how to shorten the rise in your 6 year old’s pants

12 Oct

Recently I pulled out all the rubber maid tubs with winter/school clothing in them. This is almost as good as Christmas for the kids (and me.) I went through and pulled out all the jeans. Everyone was well supplied except Pumpkin Pie. There were 6 pair of long pants that fit her in the waist and the legs were more or less the correct length. However, the rise each pair was so long that the crotch was hanging down near her knees. Obviously this wouldn’t do.

After thinking about it, I decided to try and shorten the rise myself–since if I ruined the pants, nothing was lost–she couldn’t wear them anyway.

If these were homemade pants, I could just cut off the waist. But these pants had little pockets and fake flies sewn in, so cutting inches off the top wouldn’t work. I googled around and couldn’t find anyone who had done this (and blogged about it).

So here is what I did. My first try, I cut too much and sewed more than would have been necessary and then took out too much fabric and created leggings. Pumpkin Pie refused to wear them. You get the benefit of version 2.0. Yay for you 🙂

#1 Start with a pair of pants/jeans that do fit properly. Lucky for me we had one. They were GAP jeans in a size 6 regular.

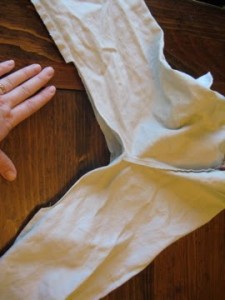
Here is a comparison of the khaki’s I’m modifying and the GAP jeans. You can see the difference in rise length.

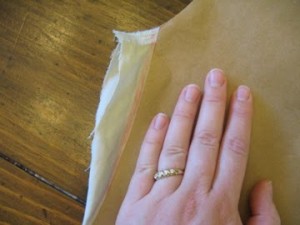
#2 Turn the good fitting jeans inside out and fold them in half so you can see the curve of the back crotch/rise seam. Fold them as close as you can on the seam lines. Lay the pants on a piece of heavy paper and trace around them. I had brown paper this time. My favorite paper to use is wrapping paper that has the grid lines on the wrong side. I used an orange crayon to trace around them. You want to get as accurately as possible the waistline, crotch curve, and hip line of the pants, as well as the taper from the curve to the legs.

#3 Fold the jeans in half the other way to get the front crotch curve. Trace as in step 2.

#4 cut out the two pattern pieces you just created. label them front and back, although the back is the one with the larger curve–if you forgot to label. 🙂

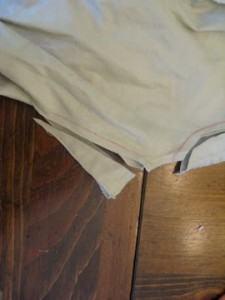
#5 Take the pants to be altered and turn them wrong side out. Trim off the inseam from about the knees up. Trust me, you do not want to be trying to match the bottom hem and fixing the crotch. (version 1.0, remember) If the pants you are altering already have fairly narrow legs, you may want to unpick the seam instead of trimming it off. Your call.

#6 Fold the pants in half so that the front rise is on one side. I took a pin and placed it in the side seam to keep the pants from shifting because of the elastic waistband. Match your homemade pattern to the side seam and trace a new crotch seam onto the pants with your orange crayon. ***Do not be tempted to match up the crotch and trace a new side seam.*** (version 1.o, remember?)

Plus at the super cool Fashion Incubator Blog you can see a great explanation of why that won’t work. Don’t blame me if you loose a couple hours there reading all about why jeans don’t fit anymore. Loved that blog!!

****note: I found that this resulted in taking about an inch out of the waistband as well. Just follow the line up to the top and don’t worry about it. I didn’t cut the waistband until after I had re-sewn the line.

Back to Pumpkin Pie’s Pants

#7 LEAVING A SEAM ALLOWANCE OF 1/4-1/2 inch, trim off the excess crotch fabric–don’t cut through the waistband yet, either. Put the pants in your sewing machine and sew the new crotch seam on the crayon line you traced. Sew it again for reinforcement. Now you can trim off the extra waistband material.

#8 Fold the pants so that the front crotch is out. Line your front pattern up with the side seams and draw your new crotch. I found on the pants I was doing, all I needed to do was take off the end and taper the legs in. So I didn’t have to resew the front rise. That was good because the fake fly probably would have gotten in the way.

#9 Open up the pants and line up the opening in the inseam. Pin this carefully. If one side is longer than the other, check your crotch lines and trim a bit.

#10 Sew up the inseam and reinforce–I used a serger-like stitch on my machine.

Rejoice in your thriftyness and have your child try on her new and improved pants. 🙂

Okay, they could have been taken up even a little more. Next time I be more careful in the pattern tracing stage. Let it be a lesson to you.

Here is a comparison of the two pants after Altering the khaki pair.

Don’t Hate Me Because My Hat is Beautiful

28 Jan

Or, the Story of a Sweater.

About 5 years ago, I purchased a red wool sweater at a thrift shop. I wanted to felt it and use it for quilting or other crafty goodness.

The tag read:
15% nylon
40% Lambswool
45% Angora Rabbit Hair

100% Lovely!

I washed it in hot water and dried it on high in the dryer 2 times. It shrunk some, bled ALOT of red dye out and got all furry. (My aunty who knows told me the Angora doesn’t felt down as much as wool.)

But Cherry Pie, who was three at the time, loved wearing the furry red sweater which was now just her size. So I couldn’t cut it up.

After being forgotten at the bottom of the dress-up box for years, it is time for Sweater to have a new life!

I’m having fun deciding what to do with the sleeves.

p.s. Thanks to DH for taking such nice pictures for me. Yes the lighting is less than spectacular and yes, my eyes are red. That is because I never have time for sewing except at 11:00 p.m.

Fleece Mittens Pattern

5 Dec

Last week I discovered the the pattern I linked to for my Fleece Mittens Tutorial was no longer available online. Luckily, I have a hard copy of the two different patterns I referred to. I have turned it into a PDF file and here it is for you, incase you wish to make fleece mittens for your lovely childrens.

It isn’t the best pattern in the world. But if it snowed last night and you find yourself mittenless and your kids are begging to go outside with socks on their hands, this is infinitely better. (Because they need to play outside and socks just don’t hold off the wet cold for very long.)

PDF Pattern FOR DOWNLOAD

Paper Piecing Tutorial

15 Jul

Introducing Miss Kitty and her sister. I drew this kitty quilt block and my very talented friend Vea turned it into a paper pieced pattern for me.

I am going to attempt a tutorial on my favorite way to paper piece. I’m sorry about the bad pictures. I really need to read my cousin’s blog more. In this tutorial, the picture will come first, and then a description of what is happening will come second.

Some of you may be familiar with traditional paper piecing, in which you sew through your paper pattern. I don’t like that way.

(insert picture of Ramona the Pest in the flesh)

I like my way. Here’s why:

1. You won’t sew through the paper, thus you won’t have to make more than one copy of the pattern (saves paper)
And, You won’t have to tear the paper off the fabric when you are done. (I think the tearing distorts the blocks.)

2. You don’t have to think in reverse the entire time.
3. You will always be able to tell if you are sewing your fabric piece on at the correct angle, saving endless seam ripper time.
4. You can be exact about the size you need (less wasted fabric)

Without further ado, Let us begin

(“I haven’t tested it yet, but it should be perfectly safe. Just a bit of harmless brain alteration, that’s all.”)

Supplies:
Pins- flat head pins are best
Tracing wheel or seam ripper
Ruler- a smaller one, like a 6” square is more manageable.
If you have a ruler with a ¼” lip on it, bring it!!
Cutting wheel and mat
Iron & ironing board
Scraps
Sewing machine and Pencil

As you can see, my Miss Kitty is yellow with an orange background. Your pattern has numbers on each piece. You must go in order of number or disaster beyond your imagination will occur.


We are starting with Miss Kitty’s head.

1. Take your Paper Piecing Pattern and Ruler and score all the lines with a tracing wheel or the blunt edge of your seam ripper. This is because you will be folding back the paper instead of sewing through it.

2. Measure each piece of the paper pattern. Find the longest horizontal and vertical measurement for piece #1 . Cut 1 orange piece of fabric 1 inch to 1 ½ inches larger than the pattern. As you get practiced up, you can use the smaller measurement.

*******


3. Place piece #1 face down (right side down) on the table.


4. Place the pattern face down (print side down) on top of piece #1. Make sure they are lined up and pin the fabric to the pattern. Make sure as you pin that the pin is not extending over into piece #2 (because that is where you are sewing next)


5. Fold back the corner of the pattern that has piece #2. You are folding exactly on the line between piece #1 and piece #2. (The scoring you did in step 1 makes this accurate and easy.)


6. Measure ¼” away from the fold and trim off the excess fabric. (The ¼” is seam allowance.) Pretend this picture was taken at this step and not several pieces later.


7. Place fabric piece #2 face up ( right side up) under the fabric #1. You have now created a “sandwich” with the paper on top (right side down) Piece #1 next (right side down), and Piece #2 (Right side up).


8. Line up Piece #2 with the seam allowance or Piece #1 and sew along the fold line of the pattern, but not on the paper.


9. Flip the whole thing over and press open with an iron, or finger press. Pin as necessary. (again, you have to pretend I remembered to take a picture at the actual pressing of piece 1 and 2 and not after the pressing of the entire head section.)


10. When you are done, trim the edges REMEMBERING SEAM ALLOWANCE.

11. Repeat steps 2-9 for piece #3. Sometimes you may have to move pins- it depends on how small the pieces of the block are.

Now, I want to tell you about a special circumstance:

!!!!! If you fold the pattern and the next piece is cock-eyed or at an odd angle, line up the fabric piece under the corresponding folded over portion of the pattern. When you are done sewing and unfold, it will line up perfectly!!!!!!!!!!!!!!!!!


More Explanation: (We are doing Miss Kitty’s tail now…yes I skipped the body…it is just like the head, but bigger)


Here you see the background piece cut 1 inch bigger than the paper pattern.


Then I realized that I left the seam allowance on my pattern, so I trimmed the background to fit exactly.


Now I am creating that sandwich with piece #2 of Miss Kitty’s tail face up on the bottom of the stack.


I fold along the line between piece #1 and piece #2. Woa! Is this going to come out right? Remember the rule:

Line up the fabric piece #2 under the corresponding folded over portion of the pattern. When you are done sewing and unfold, it will be right.

You may not be able to see it in the picture, but in real life, I could see the fold lines showing the outlines of piece #2 on the paper. There was yellow fabric under the outline and extending at least a quarter inch past the fold lines on all sides, so I knew I was safe.


You Doubt me?


Ta Da! Happy Day 🙂 Now, trim it to quarter inch seam allowance and go on to piece #3.


It is a weird angle too, but again, see how to line up the fabric under the folded over paper #3


Three sections of Miss Kitty, now ready to be put together.

p.s. to get Miss Kitty’s sister, flip the pattern over and work from the back.

soft leather baby shoes-tutorial

7 Mar

I won’t ever actually do this, but one can dream, right?

http://blog.ohelene.net/?p=12

Never-Fail Cookies

6 Feb

I have had a request for absolutely scrumptious, never-fail cookies. This request is from my sister, who, last time she was at my house, she made no less than 3 batches of cookies which all turned out awful. Well, not awful, the first two tasted okay, but had other issues…

This is a hard one, because I am still working on being a good cookie maker myself, and I am always doing things like trying to use whole-wheat flour because it is healthier and tastes better. But that really changes the texture of you cookies.

I would have to say that my only never-fail treat recipe is to melt a cup of semi-sweet chocolate chips, stir in a handful or two of mini-marshmallows and chow down.

I’ll get back to you on the cookie recipe….

PLUS THIS IS SO EXCITING!!!!!!!!!!!ARE YOU READY??????????

I figured out how to link pdf files to my blog. So now you can see my patterns for felt food. Happy Day 🙂
FeltFoodPost

Okay, One more MARVELOUS THING. MY LIFE IS CHANGED FOREVER. YOU WILL WANT THIS. READ ON….

I signed up for a google account so that I could have this blog. I went to http://www.googlepages.com to find a host for my pdf files so that I could link them to this post. I had to sign up for a gmail (email) account, but now I have a pdf file host and all for free. Gmail looks pretty cool. And on my “My Accounts” page of my google account, there was a link called “Reader.”

I wondered what it was so I clicked on it. It is like a sort of email inbox, only instead of sending you emails, It checks all your favorite websites/blogs and lets you know if anything new is posted on them. No more forgetting to check Molly Chicken’s site anymore. I “Subscribed” (put in the links) to all my favorite blogs. Now I can just go to my google account and check the reader. It is amazing.

It is like getting an email every time my favorite people post on their blogs!! I feel so special.

Snow!! and Mittens Tutorial

1 Feb

***Edited 12-01-09 I just discovered the pattern I linked to is no longer available. Here is  a PDF file of the pattern. ** thanks

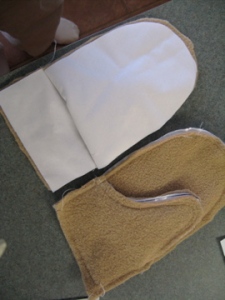
It snowed yesterday and last night!! Our first real snow of the winter! The kids were so excited to go out and play until their father said “You must clean your rooms first.” “Aww, Dad, you ruin everything.” Two of them didn’t have mittens that fit, however, so I promised to make them some while they cleaned their rooms. I got the pattern here from the LDS Humanitarian Aid Website. **See above for the pattern.  The one I chose was Fleece Mittens with a Ribbing cuff . I think in future I would choose the “Fleece Mittens with Elastic band” they look much easier to sew. The directions look more thorough as well. I am writing this tutorial in case you decide to be crazy and do the hard mittens, like me. I do like how long the cuff turns out to be. That is my pet peeve about store mittens, the cuffs are never long enough to tuck into coat sleeves.

I didn’t trust the fleece to keep the kids dry. I have some scraps of PLU (polyurethane treated fabric) left over from making diapers, and I added a layer of that on the outside to waterproof the mittens.

Trace the pattern pieces onto the shiny side of the PLU. (the wrong side). Trace 2 for each piece, remembering to flip over the thumb pieces (A & B) so that you get a right hand and a left hand mitten. Cut them out. You can just pin the pattern pieces to the fleece to cut it–pay attention to which way the stretch is supposed to go.

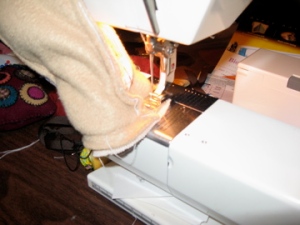
After cutting out 2 of each pattern piece. I basted the PLU to its corresponding fleece piece. Baste them wrong sides together as you will not be turning them. Don’t forget to baste along the “bottom”–the straight part that will sew onto the cuff. This will divert disaster. (see more later.) **NOTE sew with the fleece on the bottom. That way, the machine feed-dogs will help to keep the fleece from stretching and distorting too much.

Here is pattern piece A sewn to pattern piece B (the thumb)

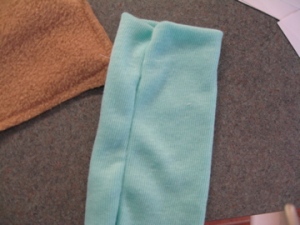
Here is the cuff, sewn and turned:

Here I have turned the cuff right-side out and then tucked it inside the mitten. Imagine this is the sleeve on a dress or shirt–that is why you want the cuff right side out. When you turn the whole thing, it will all work out right.

This is the trickiest part, sewing the cuff onto the mitten

Here is why you should baste across the bottom, to prevent this:

Here is the final product. I know, my skills are *great,* but this 7-year old was happy. You can see that after I fixed the major boo-boo, I accidentally sewed the cuff in inside out. A.k.A. didn’t follow my own directions above. But snow time was wasting. I might fix it later…

All about Food

9 Jan

For New Years, You must eat black-eyed peas for good luck. I made Hoppin’ John Soup last night and it was TAS-T-EE.
Here is my recipe. The best part is, that this soup tasted alot like a chicken casserole recipe that I got from “The Sweet Potatoe Queen’s Book of Love” called Death Chicken or Zipadee-do-dah Chicken. But that recipe oozes cholesterol. It has cream of chicken soup, tons of bacon, and skin-on chicken pieces. My soup is pretty low fat and good for you! If you changed the bacon to kielbasa, it would probably be South Beach diet worthy.

Zipadee-Do-Dah Hoppin’ John Soup

Brown 4 strips bacon in a pan with about 1/2 a small onion.
Drain one can black-eyed peas and 2 cans white beans.
Add 1 quart of chicken stock
1 tsp thyme
sprinkle with cayenne pepper
add 1/2 cup white rice and 1 cup water (or 1 cup already cooked brown rice)
simmer 15 minutes until heated through and rice is soft.

It is so simple, yet sooo tasty.


And I thought I would give an update on the felt food for christmas.
I made 8 pancakes (with butter and syrup), 4 fried eggs, 8 slices whole wheat bread, 4 puddles each of peanut butter and grape jelly, 8 tomatoes (or salomi, your choice) and 4 lettuce leaves.

I drew (drawed?) the patterns my self and just top stitched everything together. I added a little stuffing in the pancakes. If I can figure out how to post a pdf file then I will share the patterns I made.

**I figured it out! Here are the patterns I drew for felt food.
Bread & Fried Egg
Pancake and More

You can also find some cute patterns at Cherrymix.com