Archive | wardrobe refashion RSS feed for this section

Snow Day, Sew Day

2 Mar


Every year my mom buys a whole bunch of flannel. 

By a whole bunch, I mean that she buys several bolts of flannel, as in, she could start a store with the bolts of flannel she has in Rubbermaid tubs upstairs.  It is awesome.

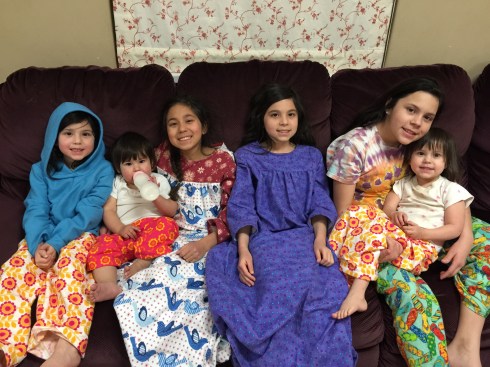
For Christmas, my sisters and sister-in-laws and I are invited over for pajama day.  We cut out pajamas and sometimes get them sewn up as well. Mom does crafts and reads stories with the grandkids while we have a great time chopping up those yards and yards of flannel.


This year, I got all the girls’ Christmas pajamas cut out, but not sewn.  Those almost pajamas languished in a pile for more than 2 months. 

Then last Friday afternoon the snow began falling.  It continued to fall all night and all the next morning.  Saturday morning I fixed breakfast (funnel cakes) and cleaned up the kitchen.  Then it was time to fix lunch (hash browns scrambled eggs, and country gravy–I was in a breakfast mood still).  After lunch I took a nap (pregnant ladies get to do that sometimes. ) When I woke up the snow was still falling.  

So I got out my sewing machine.  I popped my 6 hour A&E Pride and Prejudice (Colin Firth and Jennifer Ehle) in the DVD player.  I pulled out that stack of Christmas pajamas and got busy.  By the time Mr. Darcy and Elizabeth Bennett were married and kissing the bride, I had finished four flannel pants, one fleece pants and matching fleece hoodie, and one nightgown.  

I still had one nightgown left, so I put I my Focus Films version of Pride and Prejudice (Kiera Knightly and Matthew McFaydden). That was a mistake.  While I can sometime watch this version and get enjoyment from it (sometimes I need a P&P fix and I don’t have 6 hours), Kiera just can’t hold up in a back to back comparison.  The timing of every line is off and the whole thing is over acted.  

I just put my head down and finished that last nightgown.  

Finishing that big project was so satisfying, that I got sewing fever.  Church was canceled on Sunday because of bad road conditions and I had to fight the siren song of my sewing machine all day long.  But I triumphed over that temptation and my machine had its day of rest.  

Then today, I whipped the cover back off and sewed again.  Peach Pie and Pumpkin Pie each have an 18″ doll that they got for Christmas three years ago.  (They aren’t American Girl Dolls, they are a Target knock-off version.)

Well the dream of these two girls hearts has been to have matching pajamas with their dolls.  I saved the scraps from cutting out their nightgowns and Voila!  Today their wildest dreams came true!!


I was a little worried when I got out the pattern pieces.  These doll clothes always take more fabric than I think they should.

If you look closely, you can see that I quilted the yoke on this nightgown. I used the AG pattern for Kristen’s nightgown, which you can download here.  I just left the cuffs off the sleeves and turned the neck piece under so the nightgown would be the same as Peach Pie’s. 

Pumpkin Pie is happy too.  Hooray for being twiners with your doll!

One good thing about these dolls is that they make thinking up Christmas presents easy.  What shall I get for the girls for Christmas?  Doll clothes & accessories!!


Last Christmas, I made this beautiful red wool coat from an old wool blazer and a little girl’s plaid wool shirt.  Isn’t it gorgoeus?!! I had so much fun sewing it.  


I enbroidered the button holes by hand because they were so small that I was afraid my machine would just bung them up.  The covered buttons came right from the shirt.  


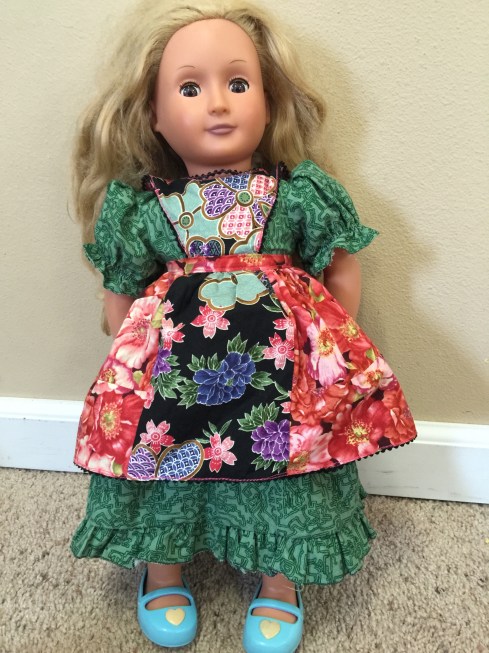
Sewing doll clothes is so much more fun now than it was when I was a girl, because the clothes look good and fit the doll when I am done!!  This apron dress was made from scraps left over from a dress I made Peach Pie.  It isn’t as close a match in style as the nightgown, but it’s not too bad.  That tiny ric rac around the apron was murderous to sew.


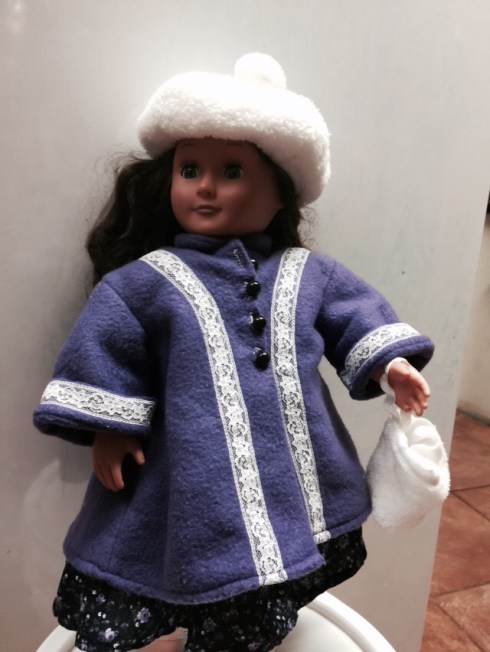
I didn’t have another thrifted  wool piece to make PumpkinPie’s doll coat, so hers is made from fleece.  It worked well enough and is pretty, but it isn’t luminous the way the wool is.  Yes, I made the tam-o-shanter and muff, too.


This dress does not correspond to any of PumpkinPie’s wardrobe.  It is just purple, which was her favorite color for a long time.  Also, the flowers were a good scale for a doll dress. The coats and this purple dress came from Addy’s Pretty Clothes patterns.  The tam and muff are Samantha’s.  In my opinion, Addy and Josephine have the prettiest dresses.

So much fun!! I want to make more!!

20 minute Maternity Jeans

21 Sep

These are things I’m really wanting to buy right now.

Dansco Clogs

Sofft Black Heels

Simply Vera, Vera Wang earings

However, what I NEED is Maternity Jeans. I have lots of maternity capri pants but
#1 it isn’t sandal/flip flop weather any more and I look dorky in sneakers & capris

#2 I am preggo enough that I don’t care to shave my legs any more.

But Bubba needs new jeans too–more than I do. So it’s the old sewing machine and helpful online tutorials for me. Yay.

This tutorial on Craftster is the best maternity jean tutorial I’ve seen. It took me 20 minutes from start to finish and that included the time I took to find the jeans, dig out an old t-shirt and thread, and get my sewing machine out of storage–where it has been banished while I’m in DIQ!!

Here is my result! I’m so proud!! Retail therapy is great, but the self-fulfillment that comes from making something useful out of stuff you already had is much more lasting.

1 Tutorial from Craftster. I *heart* Craftster!!

1 pair $7 clearance jeans from Lane Bryant that I was only skinny enough to wear for about a month. Perhaps they shrunk in the wash?

1 old t-shirt generously, albeit unknowingly, donated by my DH.

ha ha just kidding. I used my own shirt. I had one that was really too small that had a good lycra content for stretchy but firm.

1 bit of thread, scissors and my handy dandy Bernina 1008.

I did 2 things differently from the tutorial.
#1 I didn’t have to sew the zipper shut because I couldn’t zip it even 1/4″. I just cut the whole zipper out. I also didn’t cut off any of the jeans waist band in the back. They were low rise jeans and I wanted the belt loops. Just because.

**note scissors do not cut through rivets–even if they are gingers. The sewing machine needle will not penetrate rivets either.

#2 I made sure to cut the strip from the bottom of the t-shirt so I didn’t have to roll the edge and hem it. Duh! I also cut it wider than 6″ because I like the full belly coverage better.

Then after I finished sewing, I went to my friend’s house this morning and she loaned me more maternity pants, including a dressy black pair. It’s all I ever wished for. Life is good.

Wardrobe Refashion–big & shapeless into cute and tailored

24 Feb

This used to be a shapeless 2XL shirt which I bought at the DAV thrift store for $3. In fact, I thought it was a men’s shirt, but my friend informed me that the buttons were on the woman side. I cut all the seams apart and using pattern NEW LOOK 6407,

I recut it out. I made a size 16 because I am not one of those tiny petite creatures that you usually see on wardrobe refashion blogs–you know, the ones who can take a men’s shirt and have enough fabric to make a dress. sigh.

Anyway, I lined the pattern pieces up with the shoulder seam and the button placket and chopped away, marking the darts. the only change I made to the pattern was to cut a round neckline because I wanted it that way.

It was pretty much the same amount of work as just making the shirt from new fabric, except :

I didn’t have to make any button holes or sew on any buttons. That was TOTALLY WORTH IT!! I hate making button holes.

Plus buying fabric and buttons would have cost me more than $3.

I really like this pattern and will be using it again. I tried on several button down shirts at the mall recently, and was very depressed at how top heavy they made me look. This pattern fits me as if I was that skinny girl who lives in my head, instead of the generously proportioned mother of 5 that I really am.

Don’t Hate Me Because My Hat is Beautiful

28 Jan

Or, the Story of a Sweater.

About 5 years ago, I purchased a red wool sweater at a thrift shop. I wanted to felt it and use it for quilting or other crafty goodness.

The tag read:
15% nylon
40% Lambswool
45% Angora Rabbit Hair

100% Lovely!

I washed it in hot water and dried it on high in the dryer 2 times. It shrunk some, bled ALOT of red dye out and got all furry. (My aunty who knows told me the Angora doesn’t felt down as much as wool.)

But Cherry Pie, who was three at the time, loved wearing the furry red sweater which was now just her size. So I couldn’t cut it up.

After being forgotten at the bottom of the dress-up box for years, it is time for Sweater to have a new life!

I’m having fun deciding what to do with the sleeves.

p.s. Thanks to DH for taking such nice pictures for me. Yes the lighting is less than spectacular and yes, my eyes are red. That is because I never have time for sewing except at 11:00 p.m.

Wardrobe Refashion

1 May

Yesterday morning, this boring chok-er-ific turtleneck became a cute circle neck shirt

thanks to this tutorial on Craftstylish.

I didn’t mark anything and just cut and sewed with abandon. It turned out okay if you don’t look too close.

I plan on doing more of these and turning all my ugly t-shirts into cute girly shirts.

I did one extra step after the tutorial, which was to fold the new neck yoke down to the wrong side and topstitch the whole thing so that it looks like bias binding for the collar.

At first, I wished I had cut the front down more that the back so that I could remember which was the front of the shirt. Then I realized that I was free to choose the side with the least number of sewing mistakes because they were the same. So it worked out well. 🙂

Yes, I made the denim skirt out of jeans as well– momma jeans that I paid $1 for at the thrift store. They were a tad snug, but the process of making the skirt fixed that. This tutorial from NotMartha is pretty close to what I did.

The only difference is that because I made it shorter, I could use the bottom half of the jeans to fill in the back, instead of using other fabric.

Also, I added the ruffle to the bottom and clipped all my seams like you would for one of those rag quilts–so the edges would fray more quickly.

It was a bit tricky to add the ruffle and make the denim raw edge still be exposed. Not that tricky, but you have to realize that it is what you want, or you won’t get it.

A note on making jean skirts: the skirt will always want to follow the same basic shape that the jeans did. Aka: momma jeans made into a skirt will taper in. If you want more of a straight skirt or an A-line, you have to use stovepipe or straight-leg jeans.