Archive | sewing RSS feed for this section

20 minute Maternity Jeans

21 Sep

These are things I’m really wanting to buy right now.

Dansco Clogs

Sofft Black Heels

Simply Vera, Vera Wang earings

However, what I NEED is Maternity Jeans. I have lots of maternity capri pants but
#1 it isn’t sandal/flip flop weather any more and I look dorky in sneakers & capris

#2 I am preggo enough that I don’t care to shave my legs any more.

But Bubba needs new jeans too–more than I do. So it’s the old sewing machine and helpful online tutorials for me. Yay.

This tutorial on Craftster is the best maternity jean tutorial I’ve seen. It took me 20 minutes from start to finish and that included the time I took to find the jeans, dig out an old t-shirt and thread, and get my sewing machine out of storage–where it has been banished while I’m in DIQ!!

Here is my result! I’m so proud!! Retail therapy is great, but the self-fulfillment that comes from making something useful out of stuff you already had is much more lasting.

1 Tutorial from Craftster. I *heart* Craftster!!

1 pair $7 clearance jeans from Lane Bryant that I was only skinny enough to wear for about a month. Perhaps they shrunk in the wash?

1 old t-shirt generously, albeit unknowingly, donated by my DH.

ha ha just kidding. I used my own shirt. I had one that was really too small that had a good lycra content for stretchy but firm.

1 bit of thread, scissors and my handy dandy Bernina 1008.

I did 2 things differently from the tutorial.
#1 I didn’t have to sew the zipper shut because I couldn’t zip it even 1/4″. I just cut the whole zipper out. I also didn’t cut off any of the jeans waist band in the back. They were low rise jeans and I wanted the belt loops. Just because.

**note scissors do not cut through rivets–even if they are gingers. The sewing machine needle will not penetrate rivets either.

#2 I made sure to cut the strip from the bottom of the t-shirt so I didn’t have to roll the edge and hem it. Duh! I also cut it wider than 6″ because I like the full belly coverage better.

Then after I finished sewing, I went to my friend’s house this morning and she loaned me more maternity pants, including a dressy black pair. It’s all I ever wished for. Life is good.

Sewing Woes

5 Sep

Nothing like sewing a zipper into a dress for the third time to make me want to say,

“Darny darn darn darn darn.”

Day 5 of the Jane Austen Dress

11 Jun

day 5: Jane Austen dress
Today I took a break from actual sewing because the muslin was freaking me out.

I know it’s so I can make sure it “fits right” but on a style of clothing that is so very different from what I’m used to, how do I know if it is fitting right?

I read some internet articles on regency fitting and regency stays, but just let them sit in the back of my mind, I wasn’t sure yet how to apply the knowlege.

Also I needed a helper.

So I weeded the garden and contemplated the fact that I’m actually about Mrs. Bennett’s age and not Elizabeth Bennett’s age.

Serendipity

13 Apr

Sometimes If I just click on tabs on the side of blogs, I end up somewhere cool.

This lady did a blog last year-12 crafts til Christmas and shared what she did.

and she made a PDF file of how to make a Pillow Buddy!!!!!!!!!!!!!!!!!!!!!!!!!!!!!!!!!!!!!!!!!!!!!!!!!!!!!!!!!!!!!!!!!!!!!!!!!!!!!!!!!!!!!!!!!!

I love her forever.

and my children will love her forever once I’ve purchased fabric and created these for all of them.

They’ll love me forever also.

Now, do I make them for Easter, Birthdays or Christmas??? (listed in order of nearness in time. Probably Christmas is the only realistic choice–but not the fun choice.)

Tutorial: how to shorten the rise in your 6 year old’s pants

12 Oct

Recently I pulled out all the rubber maid tubs with winter/school clothing in them. This is almost as good as Christmas for the kids (and me.) I went through and pulled out all the jeans. Everyone was well supplied except Pumpkin Pie. There were 6 pair of long pants that fit her in the waist and the legs were more or less the correct length. However, the rise each pair was so long that the crotch was hanging down near her knees. Obviously this wouldn’t do.

After thinking about it, I decided to try and shorten the rise myself–since if I ruined the pants, nothing was lost–she couldn’t wear them anyway.

If these were homemade pants, I could just cut off the waist. But these pants had little pockets and fake flies sewn in, so cutting inches off the top wouldn’t work. I googled around and couldn’t find anyone who had done this (and blogged about it).

So here is what I did. My first try, I cut too much and sewed more than would have been necessary and then took out too much fabric and created leggings. Pumpkin Pie refused to wear them. You get the benefit of version 2.0. Yay for you πŸ™‚

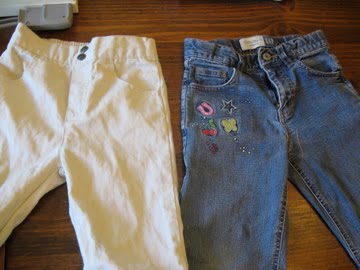
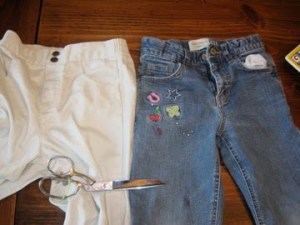
#1 Start with a pair of pants/jeans that do fit properly. Lucky for me we had one. They were GAP jeans in a size 6 regular.

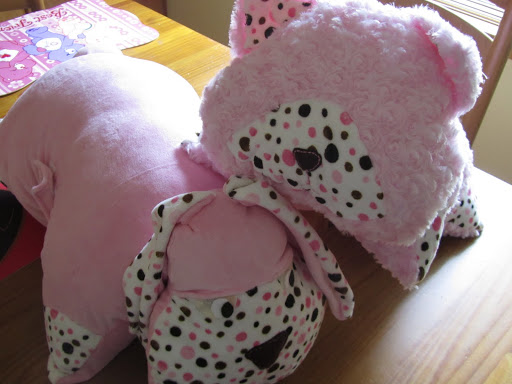
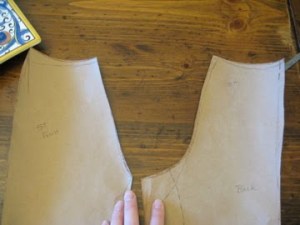
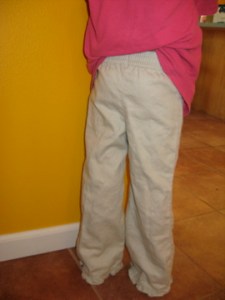
Here is a comparison of the khaki’s I’m modifying and the GAP jeans. You can see the difference in rise length.

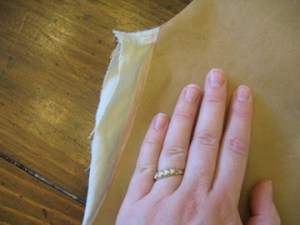
#2 Turn the good fitting jeans inside out and fold them in half so you can see the curve of the back crotch/rise seam. Fold them as close as you can on the seam lines. Lay the pants on a piece of heavy paper and trace around them. I had brown paper this time. My favorite paper to use is wrapping paper that has the grid lines on the wrong side. I used an orange crayon to trace around them. You want to get as accurately as possible the waistline, crotch curve, and hip line of the pants, as well as the taper from the curve to the legs.

#3 Fold the jeans in half the other way to get the front crotch curve. Trace as in step 2.

#4 cut out the two pattern pieces you just created. label them front and back, although the back is the one with the larger curve–if you forgot to label. πŸ™‚

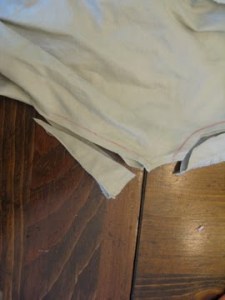
#5 Take the pants to be altered and turn them wrong side out. Trim off the inseam from about the knees up. Trust me, you do not want to be trying to match the bottom hem and fixing the crotch. (version 1.0, remember) If the pants you are altering already have fairly narrow legs, you may want to unpick the seam instead of trimming it off. Your call.

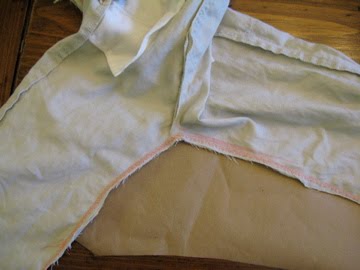
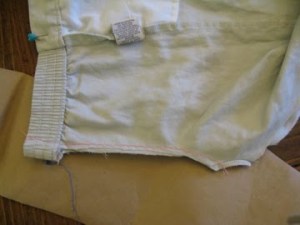
#6 Fold the pants in half so that the front rise is on one side. I took a pin and placed it in the side seam to keep the pants from shifting because of the elastic waistband. Match your homemade pattern to the side seam and trace a new crotch seam onto the pants with your orange crayon. ***Do not be tempted to match up the crotch and trace a new side seam.*** (version 1.o, remember?)

Plus at the super cool Fashion Incubator Blog you can see a great explanation of why that won’t work. Don’t blame me if you loose a couple hours there reading all about why jeans don’t fit anymore. Loved that blog!!

****note: I found that this resulted in taking about an inch out of the waistband as well. Just follow the line up to the top and don’t worry about it. I didn’t cut the waistband until after I had re-sewn the line.

Back to Pumpkin Pie’s Pants

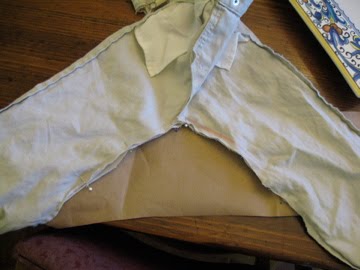
#7 LEAVING A SEAM ALLOWANCE OF 1/4-1/2 inch, trim off the excess crotch fabric–don’t cut through the waistband yet, either. Put the pants in your sewing machine and sew the new crotch seam on the crayon line you traced. Sew it again for reinforcement. Now you can trim off the extra waistband material.

#8 Fold the pants so that the front crotch is out. Line your front pattern up with the side seams and draw your new crotch. I found on the pants I was doing, all I needed to do was take off the end and taper the legs in. So I didn’t have to resew the front rise. That was good because the fake fly probably would have gotten in the way.

#9 Open up the pants and line up the opening in the inseam. Pin this carefully. If one side is longer than the other, check your crotch lines and trim a bit.

#10 Sew up the inseam and reinforce–I used a serger-like stitch on my machine.

Rejoice in your thriftyness and have your child try on her new and improved pants. πŸ™‚

Okay, they could have been taken up even a little more. Next time I be more careful in the pattern tracing stage. Let it be a lesson to you.

Here is a comparison of the two pants after Altering the khaki pair.

Happy 6th Birthday, Pumpkin Pie

8 Jul

Pumpkin Pie is 6. She loves to take care of babies. She loves pretty things like painted nails and fake sparkly tatoos. She writes little love notes to me often. Her favorite games are animal charades and “Guess Who.”

For her birthday, I made her a little Jolly Postman set. I was inspired by this post and this one.

I used heavyweight pellon and random fabric scraps. The pellon was easy to write on with a ball-point pen. The “stamps” are all attached with velcro and can be swapped around. I used adhesive velcro, not sew-on. I skipped the mail bag because there are already enough bags in the dress-up box, but I might take one of them and add a “Mail” label to it. I really love these envelopes. I need to make some of them.

For some time I have wanted to make a family mailbox. My mother made a family mailbox when I was about 13. It was one long banner of double-knit polyester. Each of us had a pocket on the banner with our initial appliqued in the middle. My sisters and brothers wrote each other all kinds of notes. I even published a family newspaper, “Hansen Happenings” using an old manual typewriter. I have a copy of the first edition, including installment one of the “Storie Special: The Magic Rope” a fairy tale written by my sister, Amanda, and me. It featured a strong young woman and her adventures on the way to rescue her true love. We were girl-power feminists and we never knew it. The newspaper also inclues a “Lost & Found” column, a “Dear Jane” column and several announcements of summer camp plans and new clubs various family members were forming. There were 7 kids then and we lived way out in the country. We had to entertain ourselves!

The DH has also been busy. Here he proudly displays the fruits of his faith and labor.

I was the nay-sayer who thought carrots were too hard to grow. He has also been to South Dakota with his guard unit, for Operation Golden Coyote, to help the National Forest Service.


There he is driving a dozer. (Usually, he just supervises the work since he is the officer. This is me bragging. My DH is a sexy lieutenant. brag. brag.)

Much Better

6 Jun

I leaned something profound today.

Something rather life-changing.

A day which doesn’t begin well can be made much better if the Man of the House cooks dinner.

These Chipotle Lime marinated shrimp were muy delicioso. It is a secret recipe that DH found on the internet and made more secret by adding garlic and cilantro.

Also, I have to brag on my kids, who finished their first sewing projects. (“Finished” being key, as the both have begun things in the past which never reached completion.) Way to go Cherry Pie and Bubba

Cherry Pie over decorated hers. I started stressing out and then I took a deep breath and reminded myself that it was her little bag and she could have it how she wanted.


And Cutie Pie got her first hair cut–which makes me a little sad, because I can’t do these piggy tails any more. But she already seems cooler, so it is worth the sacrifice.

Wardrobe Refashion–big & shapeless into cute and tailored

24 Feb

This used to be a shapeless 2XL shirt which I bought at the DAV thrift store for $3. In fact, I thought it was a men’s shirt, but my friend informed me that the buttons were on the woman side. I cut all the seams apart and using pattern NEW LOOK 6407,

I recut it out. I made a size 16 because I am not one of those tiny petite creatures that you usually see on wardrobe refashion blogs–you know, the ones who can take a men’s shirt and have enough fabric to make a dress. sigh.

Anyway, I lined the pattern pieces up with the shoulder seam and the button placket and chopped away, marking the darts. the only change I made to the pattern was to cut a round neckline because I wanted it that way.

It was pretty much the same amount of work as just making the shirt from new fabric, except :

I didn’t have to make any button holes or sew on any buttons. That was TOTALLY WORTH IT!! I hate making button holes.

Plus buying fabric and buttons would have cost me more than $3.

I really like this pattern and will be using it again. I tried on several button down shirts at the mall recently, and was very depressed at how top heavy they made me look. This pattern fits me as if I was that skinny girl who lives in my head, instead of the generously proportioned mother of 5 that I really am.

Don’t Hate Me Because My Hat is Beautiful

28 Jan

Or, the Story of a Sweater.

About 5 years ago, I purchased a red wool sweater at a thrift shop. I wanted to felt it and use it for quilting or other crafty goodness.

The tag read:
15% nylon
40% Lambswool
45% Angora Rabbit Hair

100% Lovely!

I washed it in hot water and dried it on high in the dryer 2 times. It shrunk some, bled ALOT of red dye out and got all furry. (My aunty who knows told me the Angora doesn’t felt down as much as wool.)

But Cherry Pie, who was three at the time, loved wearing the furry red sweater which was now just her size. So I couldn’t cut it up.

After being forgotten at the bottom of the dress-up box for years, it is time for Sweater to have a new life!

I’m having fun deciding what to do with the sleeves.

p.s. Thanks to DH for taking such nice pictures for me. Yes the lighting is less than spectacular and yes, my eyes are red. That is because I never have time for sewing except at 11:00 p.m.

Christmas Apron

17 Dec


My Quilting Guild is having an apron swap tonight. Naturally, I began sewing two days ago. The woman I am making for is an extra-large size so I decided that a smock apron would be best for her (plus I love smock aprons.)

I didn’t have a pattern for an apron, but I had a pattern for a shirt Simplicity 2962, which I figured I could modify. I tried to find a pic of the pattern to link to, –Apparently this pattern is no longer for sale. It is a simple round necked smock shirt. I made the front and the yoke front. Then I realized that I had to make the back yoke and part of the back (to finish the sleeve hole.)

I won’t detail all the backwards sewing (seam ripping) I had to do as I realized over and over that one more piece would have to be added.

I modified the pattern by making it open in the back with one button at the neck. Also, the back piece is much shorter because I ran out of fabric.

I hope she loves it.

I even overcame my laziness and put on ric-rac.

Now I wish I was keeping it for me. I guess that is my assurance that I did well.

I also FINALLY finished binding this table runner–which I started 3 years ago. It is already off to it’s new home. Someday I’ll finish a quilted project for myself.