Archive | kids RSS feed for this section

"Oh, the cleverness of me"–a handmade nativity

8 Feb


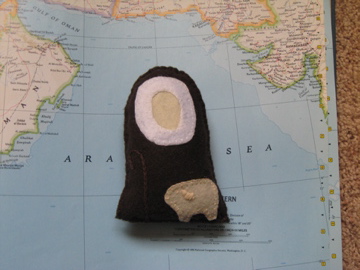
I made this little nativity set because I wanted one that my kids could play with. My aunt says I need to make a pattern up for it and I am working on it. I hope you all are excited. It is just acrylic felt and DMC floss. I am working on making the bottoms flat, so they stand up better.


shepherd

Three Kings

Holy Family

dialogue between me and my son:
Boy: “Mom, why is there yellow around baby Jesus’s face?”
Me: “Well, I wanted to show that he is from Heaven and special, so I gave him that golden halo.”
Boy: “Why does the wise man have yellow around his face?”
Me: “Umm, well, because he is a king, so he has a golden crown, plus, I like yellow and purple together.”
Boy: “Why don’t the other wise men have yellow, too?”
me: “Sigh. I don’t know.”


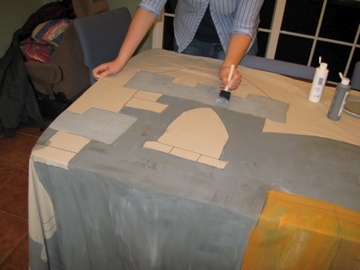
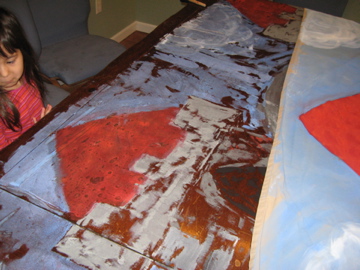
I teach the 14 & 15 year old young women at my church. Wednesday night we had a program where we talked about “Be the Girl of your Dreams.” We needed a castle, so I volunteered to make one. I took an old sheet, a sharpie marker and some acrylic paint and panicked. Luckily, my sister, Mary, came over and she gave the the courage to start. I sketched out what I wanted on paper. She suggested that I add in some random stones and said it looked great. So I took a deep breath and attacked the sheet with the sharpie. Then she helped me paint it. We mixed a little water with the paint because the sheet was soaking it up so fast. I am really proud of how well it turned out, even though it was pretty much all luck. The best part is, that now I have the sheet forever for when my kids want to play dress up. Lots of paint soaked through onto my table. Luckily, MOST of it washed off. *whew*

Last of all, I know yesterday, I said I don’t like to put in too many links because it gets overwhelming. I know when I go to other people’s blogs and the link list is a page long, I am like–how could I ever visit all those?
But I had to update my link list because it was woefully short. So, I added some links and I added a description of each one so you all could make better decisions about which ones to try. Rest assured, these are my most favorite blogs, nothing so-so here, only the most marvelous here.

Snow!! and Mittens Tutorial

1 Feb

***Edited 12-01-09 I just discovered the pattern I linked to is no longer available. Here is  a PDF file of the pattern. ** thanks

It snowed yesterday and last night!! Our first real snow of the winter! The kids were so excited to go out and play until their father said “You must clean your rooms first.” “Aww, Dad, you ruin everything.” Two of them didn’t have mittens that fit, however, so I promised to make them some while they cleaned their rooms. I got the pattern here from the LDS Humanitarian Aid Website. **See above for the pattern.  The one I chose was Fleece Mittens with a Ribbing cuff . I think in future I would choose the “Fleece Mittens with Elastic band” they look much easier to sew. The directions look more thorough as well. I am writing this tutorial in case you decide to be crazy and do the hard mittens, like me. I do like how long the cuff turns out to be. That is my pet peeve about store mittens, the cuffs are never long enough to tuck into coat sleeves.

I didn’t trust the fleece to keep the kids dry. I have some scraps of PLU (polyurethane treated fabric) left over from making diapers, and I added a layer of that on the outside to waterproof the mittens.

Trace the pattern pieces onto the shiny side of the PLU. (the wrong side). Trace 2 for each piece, remembering to flip over the thumb pieces (A & B) so that you get a right hand and a left hand mitten. Cut them out. You can just pin the pattern pieces to the fleece to cut it–pay attention to which way the stretch is supposed to go.

After cutting out 2 of each pattern piece. I basted the PLU to its corresponding fleece piece. Baste them wrong sides together as you will not be turning them. Don’t forget to baste along the “bottom”–the straight part that will sew onto the cuff. This will divert disaster. (see more later.) **NOTE sew with the fleece on the bottom. That way, the machine feed-dogs will help to keep the fleece from stretching and distorting too much.

Here is pattern piece A sewn to pattern piece B (the thumb)

Here is the cuff, sewn and turned:

Here I have turned the cuff right-side out and then tucked it inside the mitten. Imagine this is the sleeve on a dress or shirt–that is why you want the cuff right side out. When you turn the whole thing, it will all work out right.

This is the trickiest part, sewing the cuff onto the mitten

Here is why you should baste across the bottom, to prevent this:

Here is the final product. I know, my skills are *great,* but this 7-year old was happy. You can see that after I fixed the major boo-boo, I accidentally sewed the cuff in inside out. A.k.A. didn’t follow my own directions above. But snow time was wasting. I might fix it later…

Why I make stuff

11 Jan

I have been a little paranoid about posting pix of my kids online. But I have noticed that no one else seems to be worried. And I have to share this darling thing.

Freakin’ Awesome Felt

6 Dec

This is made by Lilly Bean for Mahar dry Goods So I saw it yesterday and now I am debating because
I was going to make felt paper dolls for my girls for Christmas. But this is amazing. Here is another lovely I found amazing Are you drooling yet?